Kia Forte: Forward Collision-avoidance Assist (FCA) (Camera + Radar type) / FCA warning message and system control
The FCA system produces warning messages, warning alarms, and emergency braking based on the risk of a frontal collision, such as when a vehicle ahead suddenly brakes.
The driver can select the initial warning activation time in the User Settings in the LCD display. The options for the initial Forward Collision-Avoidance Assist include Early, Normal or Late initial warning time.
Collision Warning! (1st warning)
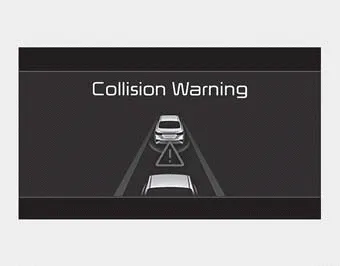
This warning message appears on the LCD display with a warning chime.
Additionally, the engine management system intervenes to help decelerate the vehicle.
- Your vehicle speed may decelerate
moderately.
- The FCA system limitedly controls
the brakes to preemptively mitigate
impact from a collision.
Emergency braking! (2nd warning)

This warning message appears on the LCD display with a warning chime.
Additionally, the engine management system intervenes to help decelerate the vehicle.
- The FCA system limitedly controls the brakes to preemptively mitigate impact from a collision. The brake control is maximized just before a collision.
System setting When the ignition switch is turned on, Forward Collision-Avoidance Assist (FCA) automatically gets activated. The system can be deactivated if the driver cancels the system from the instrument panel as follows : 'User settings → Driving assist → Forward Collision-Avoidance Assist' The warning light illuminates on the LCD display when you cancel the FCA system.
In an emergency situation, the braking system enters in ready status for prompt reaction upon the driver depressing the brake pedal. The FCA system provides additional braking power for optimum braking performance when the driver depresses the brake pedal.
Other information:
Kia Forte 2019-2024 (BD) Owner's Manual: Headlamp (High beam) bulb replacement (Headlamp Type A,B)
1. Open the hood. 2. Remove the headlamp bulb cover by turning it counterclockwise. 3. Remove the bulb-socket from the headlamp assembly by turning the bulb-socket counterclockwise until the tabs on the bulb-socket align with the slots on the headlamp assembly.
Kia Forte 2019-2024 (BD) Owner's Manual: Exterior care
Exterior general caution It is very important to follow the label directions when using any chemical cleaner or polish. Read all warning and caution statements that appear on the label. Finish maintenance Washing To help protect your vehicle’s finish from rust and deterioration, wash it thoroughly and frequently at least once a
Categories
- Manuals Home
- Kia Forte Owners Manual
- Blade replacement
- Features of your vehicle
- Normal Maintenance Schedule - Non Turbo Models
- New on site
- Most important about car
